


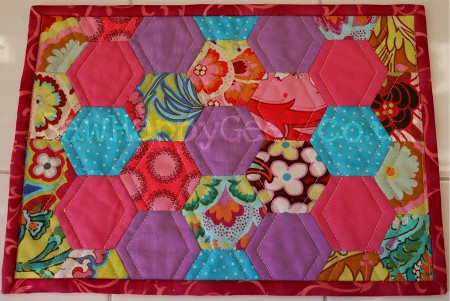
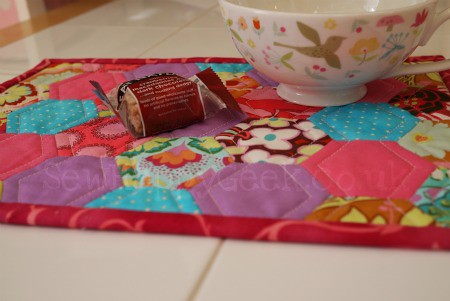
But for now, I have a very special treat for you. A guest tutorial! My dear friend Jenna over at SewHappyGeek wrote a wonderful hexagon mug rug tutorial for you. I'm participating in a mug rug swap she's organizing, and we're swapping tutorials as well as mug rugs. So exciting! How would you like to make THIS?
Yeah, I know! Me too! So let's get our hexie on. Take it away, Jenna!
Hi! I'm Jenna from SewHappyGeek. Bonnie and I met when our tutorials were ripped off because she very kindly tracked me down and let me know 'Mary' was infringing on my copyright. She has quickly become a good friend. She even joined my Mug Rug Swap v.2! So this mug rug is the perfect guest tutorial, right? If you like this tutorial, please visit my Tutorial page to see my other tutes.
So you want to get in on the hexie fun bandwagon? I don’t blame you. These little babies are sooo addictive – they’re perfect for when you’re waiting at the doctor’s, watching telly, ignoring your screaming kids, that kind of stuff. (My kid doesn’t scream anymore, thank goddess, but she frequently asks to buy apps on her iPod. Ugh.)
Anyhoo, I’ll get you started, ok? First of all, you’ll need to cut out your hexies, both paper and fabric. I use these Clover templates, tracing the ‘inner’ hexagon onto paper, and the ‘outer’ onto fabric. Then I cut them all out.
Now I’ll show you how to baste them:
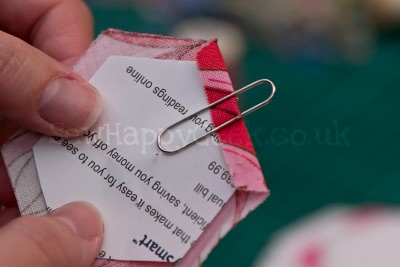
Take a paper hexagon and a fabric one. Fold over one of the sides of fabric and secure with a paper clip:
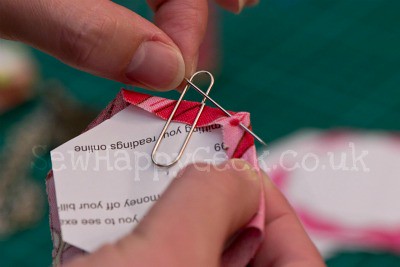
Cut a length of thread about 12” long, and make a big knot in one end, leaving a tail of about 2”. I knot mine 3 times in the same place. Thread the other end onto your needle, then fold over the adjacent side of fabric while holding it in place with your thumb:
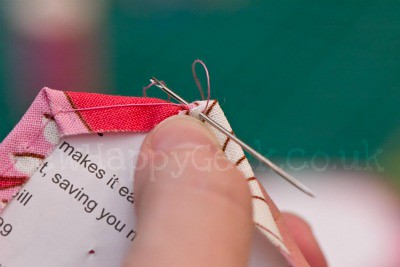
And make a stitch through the layers to keep it all together. Then go back and do another stitch because we’re paranoid and want the sides to be held firmly:
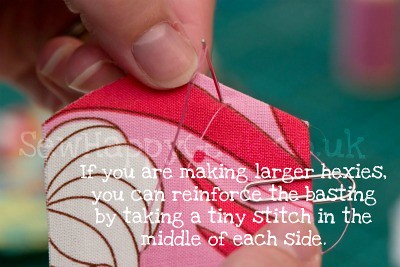
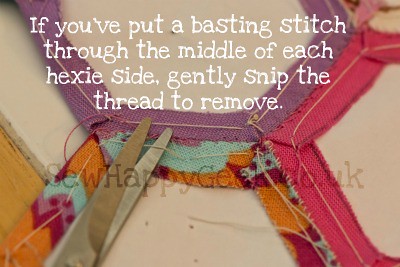
If you are making large hexies, you can add a tiny stitch in the middle of each side to ensure it all stays together:
When you have them all basted together you simply snip the threads and those tiny stitches will come out just fine.
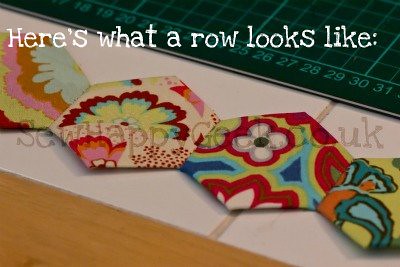
For this mug rug you’ll need 31 hexies. Once you have them all laid out, you can start stitching them together. I’ll warn you, this stage isn’t quite as fun as basting them, but you will be very proud when you get it done. And then you’ll probably start another. I pressed all mine before joining them so the folds were nice and straight.
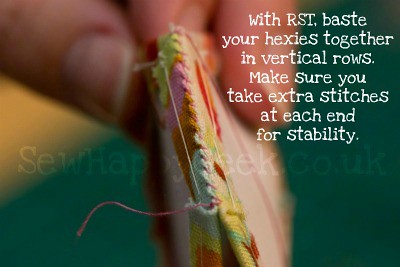
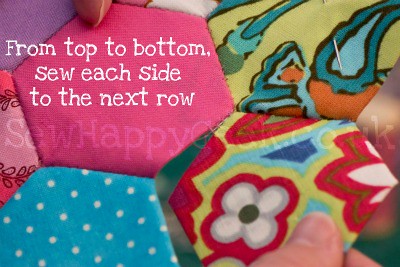
Start stitching them together in vertical rows. Simply hold them with RST in your hand and slipstitch the edges together:
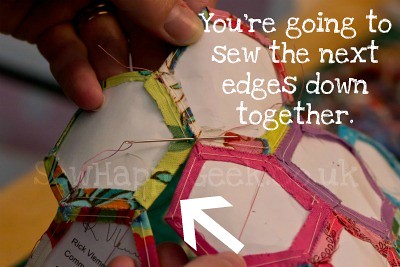
Once you have your rows, you’ll need to join them together. We’ll do this in basically the same way. Hold the edges which need to be joined together in your hand while you slipstitch the edges. ‘Lock in’ the edges with a couple of extra stitches. The pictures show how to do it:
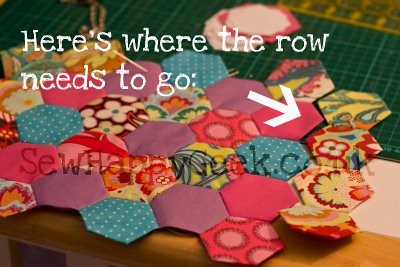
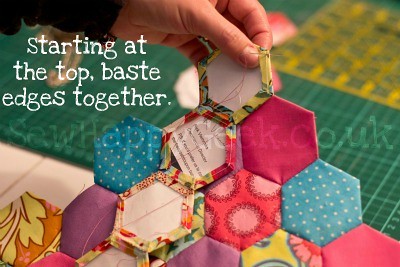

Once you get done with the first side of the top hexi, readjust the whole thing so you can stitch the next sides together, and so on all the way down to the bottom. I recommend you join them together in rows of two, then stitch the rows together.

When you are ready to baste your mug rug, take the papers out. If you put the tiny stitches in the middle of each edge, carefully snip the basting threads and gently take them out:

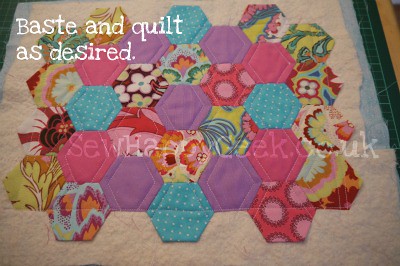
The other basting threads can stay in. Baste and quilt as desired. I quilted 1/4" along the vertical seams.
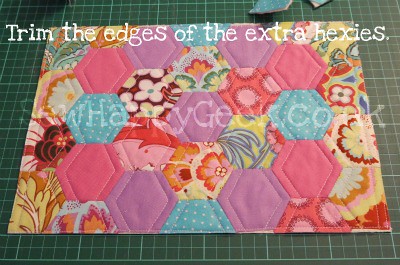
Then trim the excess off with a rotary cutter. On the top and bottom I trimmed the very top ones in half, but on the sides I just cut off the outside angle:
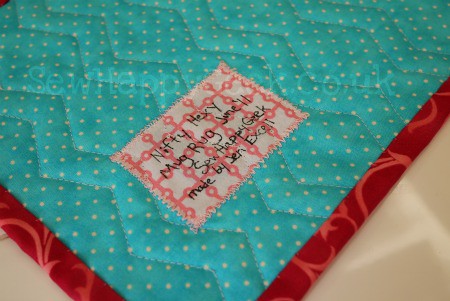
Now you just need to bind it, and I have a tutorial for that too: SewHappyGeek binding tutorial. And if you make one, I’d be thrilled if you add it to the SHG Flickr page!
Thank you Bonnie for featuring me, and thank you all so much for reading my Hexagons for the Paranoid Mug Rug Tutorial!
All Photos and Tutorial: © Copyright J C Excell, 2011. You are welcome to use any SewHappyGeek tutorial for personal use. You are even welcome to make a couple to sell, but you are not given permission to use my pictures or my words without giving me credit and linking back to the original. Sometimes my pictures have my family in them and they are never intended for public use. Also, I work very hard to provide free tutorials for my lovely readers, and anyone copying or selling my tutorials is guilty of copyright infringement.

Totally cute! I love doing hexies!
ReplyDeleteKZK
I can't wait to give it a try. :D I need to get over my aversion to hand sewing. This is too cute and I must do it!
ReplyDeleteI agree, Bonnie. These are so cute and colorful, I will have to give it a try. Sounds like a great Christmas gift...a few of these to good friends! Thanks!
DeleteThank you so much Jenna! I have been waiting for a tute on how to make these little gems :)
ReplyDeleteMy name is Deb and I am addicted to hexagons. Thank you for providing one more project for me to make with hexies. I think I now have enough to last me through about age 127!! Fortunately, yours is a quickie...so I think I will bump it up on the list since it is more likely to actually get completed!!
ReplyDeleteDeb from clutteredquilter.blogspot.com
I've not made hexies, for, oh, er over 20 years, am I really that old?! I've got a nice stash of fabric that is crying out to be hexi-fied but I think I shall save it for the winter when I really to cosy up with hand sewing
ReplyDeleteWhat a great tutorial! Thanks!
ReplyDelete--Jaclyn T
Enter my giveaway for a handmade pouch http://positiveponderings.blogspot.com/2011/07/end-of-school-giveaway.html
I'm very new at doing this, and have never done 'hexies' before. It looks interesting - a good way to use up scraps. I may try it, Lord willing, this weekend after I finish that apron. I just praise the Lord Jesus for His blessings, and finding these tutorials is just one of those blessing. Thanks so much!!
ReplyDeletei just found this tutorial and it is the best hexagon paper piecing tute i have found!! thank you so much!! the pictures are great and you explained it so well! i am very excited to try my hand at this--but until i discovered this i was not sure exactly how to do it. thank you very much!!!!!
ReplyDeleteso nice
ReplyDeleteThanks so much for the tut. & free pattern. It makes it look so simple.
ReplyDeleteSeven years ago my aunt died and left me an unfinished Grandmother's Flower Garden quilt. I never finished it because I didn't know if you were supposed to leave the papers in or take them out! Dumb, I know. Just seeing that one picture on this tutorial has pointed me in the right direction, finally! Thanks!
ReplyDeleteThis is quite nice. I've made a hexie flower grouping in a sample quilt that I did when I learned to make a quilt hand sewn. I had to mark the 1/4 inch seam and press the fabric in. Then I went by the pencil lines to sew mine together.
ReplyDeleteGreat tute!
Yogie
I wanted to pin this to my pinterest Quilt board but I wasnot able to pin any of the pictures - might Jenna the Sew Happy Geek know why? Love the post
ReplyDeleteI just checked to see if I could pin from this post and her photos, and it worked fine for me! Are you using a computer directly, or an app? And which browser are you using?
ReplyDeleteWhat size hexagons are you using?
ReplyDeleteI can't see anywhere what size Hexagons you are using. The link to the template no longer works!
ReplyDelete